



Lighting · 6 min read ·
Under-Cabinet Lighting: Getting the Task Layer Right
Where the light sits, what color it is and how it is wired decide whether a counter is lit or just decorated.
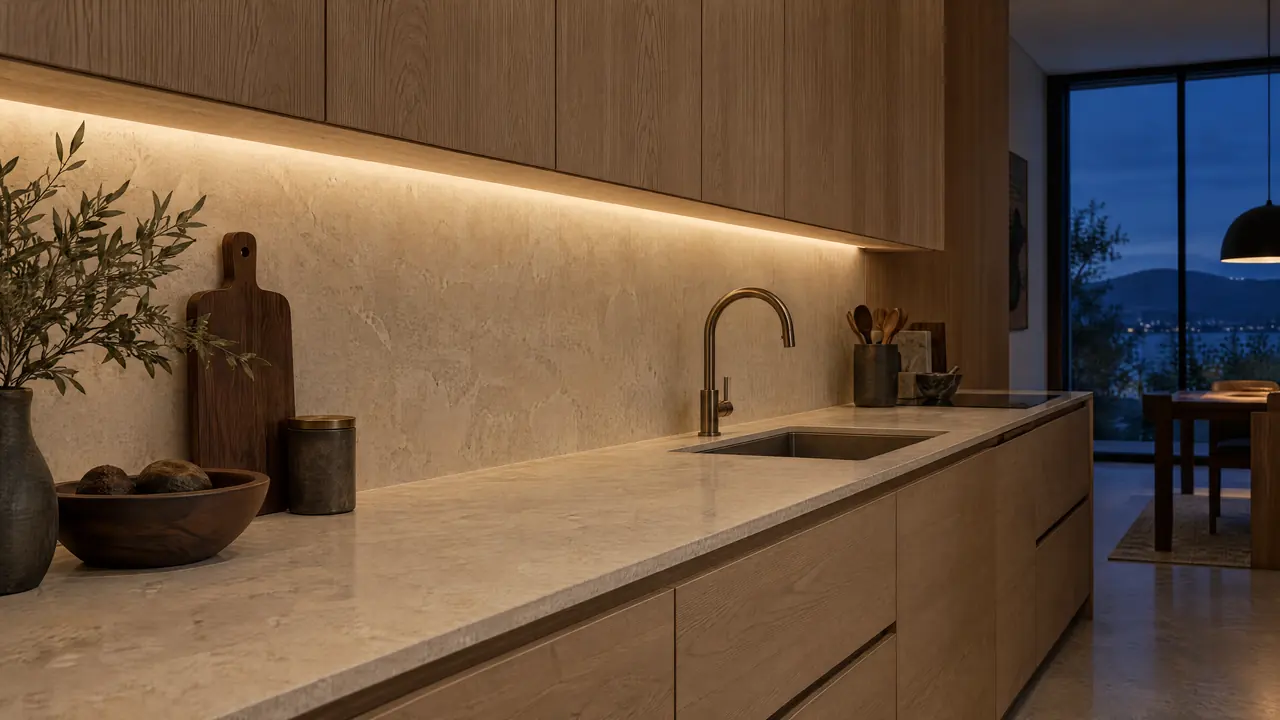
Under-cabinet lighting is the light you actually work by. Ceiling fixtures sit behind you, so at the counter your own head and shoulders throw a shadow exactly where the knife is. A light source mounted under the upper cabinets puts the light in front of you and close to the surface, and that's why it matters more than almost anything else on a kitchen lighting plan. It's also the layer most often treated as an afterthought, picked from a catalogue after the cabinets are built and fed from whatever outlet happens to be nearby.
As the evenings shorten, the gap shows. A counter that was lit by the window at six o'clock in June is in shadow by October. Here's how to plan the task layer so it looks deliberate and works every night of the year.
Start with the work surface, not the fixture
The job is simple to describe: an even band of light across the counter, from the backsplash to the front edge, with no bright spots and no visible source. Everything else follows from that.
Three things decide whether you get it. The first is which fixture type you use. The second is where it sits under the cabinet. The third is what's under it, because a polished stone counter and a matte one react to the same light very differently.
| Fixture | What the light looks like | Where it fits |
|---|---|---|
| LED tape in an aluminum channel with a diffuser | A continuous, even line with no visible dots | The best choice for custom cabinetry; can run the full length of a wall |
| Slim linear LED fixtures | Even within each fixture, with small gaps between units | Short runs and retrofits where cabinets are already installed |
| Puck lights | Pools of light with darker scallops between them | Accent light inside glass cabinets, not a work surface |
| Bare LED tape | Visible dots reflected in glossy stone and tile | Avoid on any counter you can see your reflection in |
Where the light goes under the cabinet
Mount the light line toward the front of the cabinet's underside, not tight against the wall. From the front, light falls across the whole depth of the counter and grazes the backsplash on its way down. Pushed to the back, it hammers the bottom of the backsplash, leaves the front of the counter dim and makes every grout line or vein in the stone look harsher than it is.
The fixture also needs somewhere to hide. On frameless cabinetry the cleanest answer is a shallow recess or a light rail into the bottom of the wall cabinets so the channel sits above the sightline of someone standing at the counter. That detail has to be drawn before the cabinets are made. Adding it later usually means a strip of trim screwed on underneath, and it rarely looks like it belongs.
Color, accuracy and dimming
Pick one color temperature for the under-cabinet line and match it to the rest of the kitchen. Most residential kitchens sit between 2700K and 3000K: warm enough to feel like a home in the evening, white enough to read food and stone properly. Mixing a cool task light with warm ceiling fixtures is a common mistake, and it's obvious the moment both are on.
Look at the color rendering index (CRI) too. A high-CRI source, 90 or above, shows natural materials as they are. Walnut looks like walnut instead of something muddy, and a quartzite with green or blue undertones keeps them. It also matters for cooking. Meat, greens and sauces are judged by eye.
Plan to dim it. At full output the task layer is for chopping; turned low, it becomes a quiet night light that keeps the room readable without the overheads. That only works if the LED drivers and the dimmer are specified to work together, so choose them as a pair.
Power, drivers and switching
Most under-cabinet LED tape runs at low voltage, so it needs a driver (a power supply) somewhere nearby. That box gets warm, has to be reachable if it ever fails, and needs a home that isn't the back of a drawer. In custom cabinetry the usual answer is a ventilated space above the wall cabinets or inside a nearby cabinet with a removable panel.
Long runs suffer from voltage drop, where the far end of the line glows dimmer than the end nearest the driver. A 24-volt system handles longer runs better than a 12-volt one, and very long walls can be fed from the middle or from both ends. Your electrician and the fixture manufacturer's installation instructions decide the details; the design job is to leave room for them.
Then decide how it switches. A separate switch near the main work zone is the minimum. In larger kitchens it's worth putting the task layer on a scene with the rest of the lighting so one button sets the room for cooking and another for the evening.
- If you're building new or gutting the kitchen, hardwire the task layer, plan the driver locations on the drawings and build the light recess into the cabinets.
- If the cabinets are staying, slim linear fixtures that plug into a dedicated outlet are the practical upgrade; hide the cords inside the wall cabinets.
- If you have glass-front uppers, light the inside separately and keep it on its own dimmer, so the display light never competes with the work light.
A short planning checklist
- Decide the fixture type and the recess detail before the cabinet drawings are final.
- Choose one color temperature for every layer in the room.
- Specify a high-CRI source and a diffused channel, especially over polished stone.
- Locate drivers where they can be ventilated and reached.
- Pair the drivers and dimmers, and confirm they're listed as compatible.
- Agree switching with the electrician: which switch, which scene, which zone.
Task lighting is one of several layers that should be planned together; the others are covered on our kitchen design and planning page. For how light rails and recesses are built into the boxes themselves, see custom cabinetry, or start a conversation about your own kitchen.